

 Search
User manual for Persona 360
Personas
Personas serve as an overview of all personas and their comparisons. This section also allows the user to create a simple persona without the need of defining the target group and all or selected customers.
All Personas
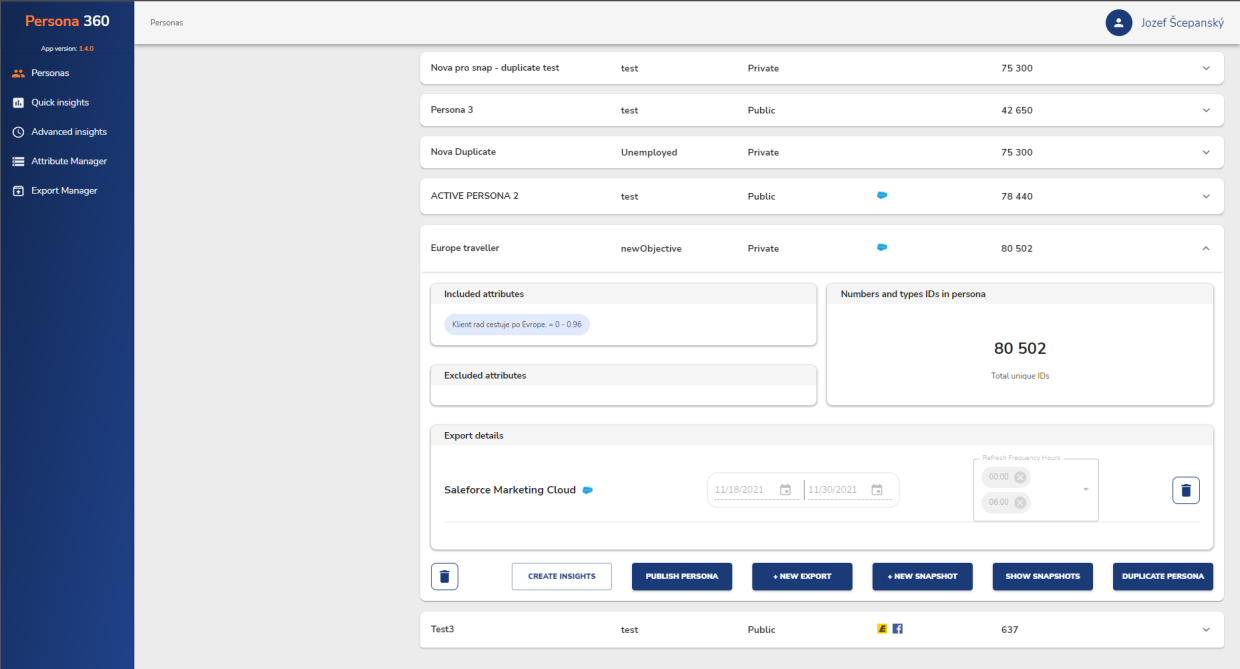
All Personas section serves as a catalogue of all created personas with the possibility of further exploration.
Each persona can be expanded to show further details:
- Included/excluded attributes - Attributes that were specified in the Parameters settings.
- Numbers of IDs - The number of IDs included in the persona.
- Export details - All the sources to which the persona is exported, including the start/end date of export, frequency of export and the option to pause or discontinue the export
- Create insights - Creates insights that will include personas' attributes (and optionally create new personas
- Publish/Unpublish persona - Change persona status to Public or Private.
- New export - Exports persona to a selected destination
- New snapshot - Creates a snapshot of a persona at a certain moment. Snapshots are being used in Compare persona, where you can compare the same persona with different time stamps. You can create an unlimited amount of snapshots
- Show snapshots - Overview of all created snapshots.
- Duplicate persona - Creates a persona with the same Parameters settings.
New Persona
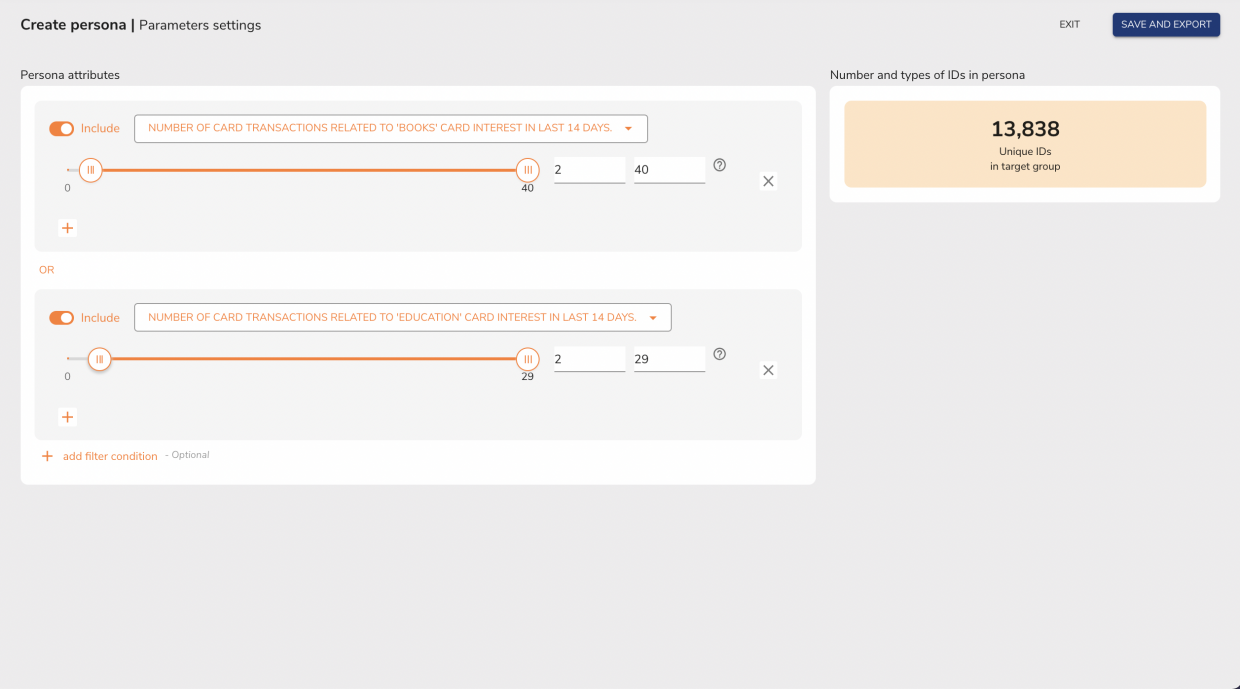
- New persona leads to persona creation that does not include a definition of all or selected customers and target group.
- It's mostly used for creating personas for which we already know the definition (e. g. I want to target all people that have cash loans and are also Apple users.). Or you can use New persona only to capture how many people have a certain attribute without needing to save the persona at the end of the process (e. g. How many people have both mortgage and cash loan?).
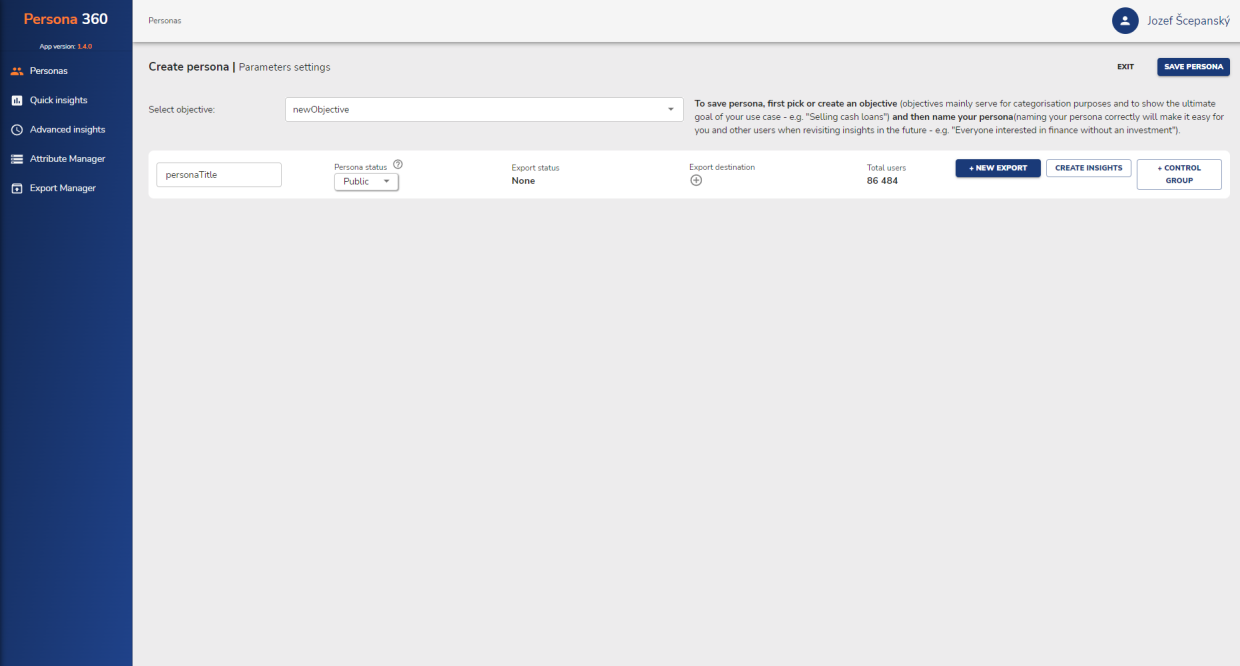
- After creating a persona, you have multiple options:
- Exit - Deletes the persona definition
- Save persona - Asks you to pick an objective of this persona (objectives mainly serve for categorisation purposes and to show the ultimate goal of your use case - e.g. "Selling cash loans") and name your persona.
- New export - Exports persona to a selected destination.
- Create insights - Takes you to Quick insight and turns your persona into a target group.
- Control group - Create a control group that can be used to compare the performance of the selected communication channel.
Compare Personas
Compare personas displays several personas at once with their KPIs. This allows for a comparison of the personas' performance across all channels. KPIs and engagement attributes shown on the screen are customisable - a combination of KPIs can be created that suit your needs best.
To create KPI & engagement attributes, you need to tag them "KPI" in the Mapping or All attributes section. If you want to compare persona to itself with a different timestamp, select Add personas and then Snapshots with the same persona you just picked for comparison. Compare personas also has the option to show other attributes (eg. demographic information).
Quick insights
Quick insights let you explore key characteristics of your selected target group and compares them to all or selected customers. The target group consists of customers that fulfil certain criteria. Learn from their behaviour and apply these findings in targeted campaigns to create personalised communication. All or selected customers is a group of people to which your target group is compared.
Tip: The top bar shows how far you are in the process, there are 6 stages in the Quick insights workflow: Create Insight, Insight, Create Personas, Manage Personas Overlaps, Export Personas, and Save Personas.
Creating insight
1. Define people you want to gain insights from
- Define a target group of customers that fulfil certain criteria and learn from their behaviour (e.g. all people that are interested in finance).
- Add attributes (some attributes might have the possibility of value selection - e.g. "Card transaction count, 10-100, and some might have category selection - e.g. "Region, East Midlands")
1. Define people you want to gain insights from

attribute with value range selection (in this case percentage˛

attribute with category selection
- You can include an attribute (only people that have the attribute will be included in the target group), or you can exclude an attribute (everyone except people who have the attribute).
- If you are looking for a specific audience, try narrowing down the target group by multiple attributes - e.g. if your target group is "people with resources that are willing to invest", it is recommended to define not only their income but also the specific activities they already engage in and are related to investment (eg. savings accounts), related interests (eg. an interest in finance), etc. This will help accurately define the audience and subsequently boost the campaign's success because the learning will be done from a well-defined target group.
- In creating personas or insights you can choose from the "and" and "or" operators. Adding attributes using the + button will add them with the "and" condition but If you want to add an "or" operator, click on add filter condition and that will create another set of conditions.˛
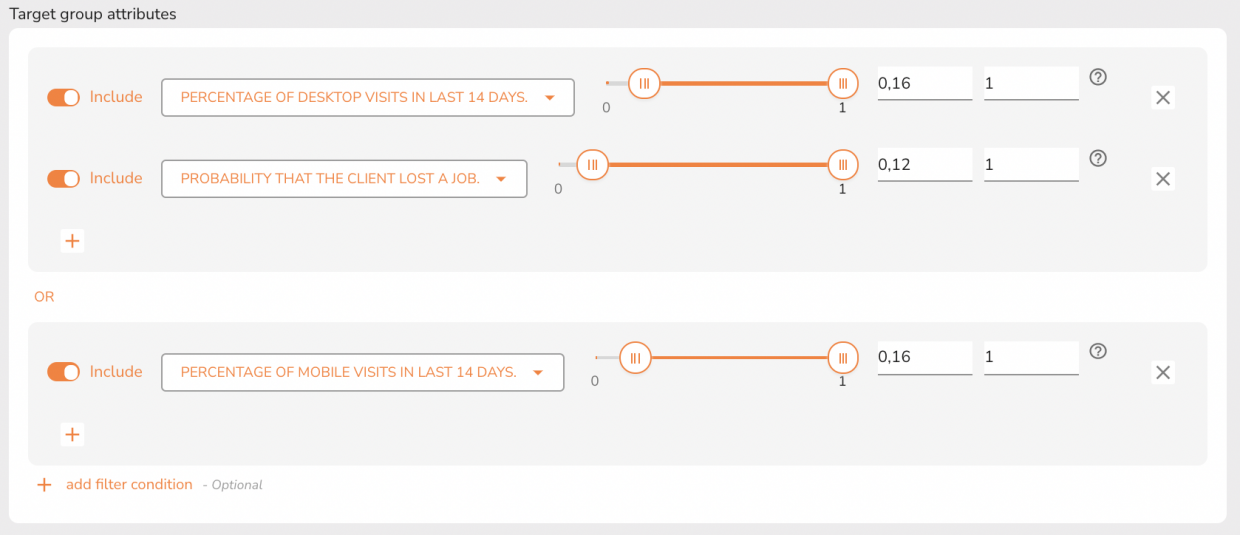
This persona will select people that have the attributes "desktop visit" and "lost job" or have the attribute "mobile visit"
2. Customise your all or selected customers for insight comparison
- Define customers that you want to compare to the target group and create personas from
Insights
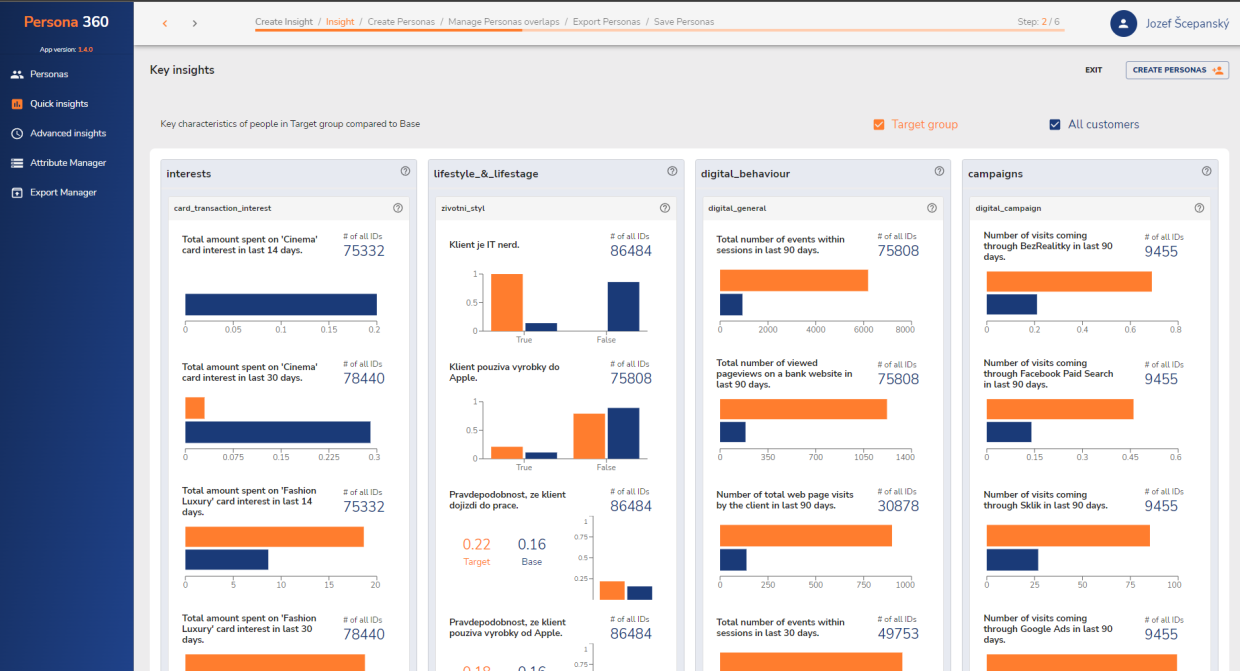
Insights are a visual representation of characteristic attributes in the target group, that is being compared to all or selected customers and sorted by their significance. They help you better understand your audience and the attributes it comprises. The target group is represented by the orange colour, while all customers (or selected customers) are represented by blue. Attribute graphs are grouped together by selected category and subcategory, that can be changed by an admin in Attribute manager. You can see the number of unique IDs of each group, average values and ratio by hovering over the specific graph.

This toolkit shows you that ID count in target group is 2560 and in the base 86484. Average probability that client commutes to work is 87% in target group and 16% in the base, that makes the difference ratio 5.61.
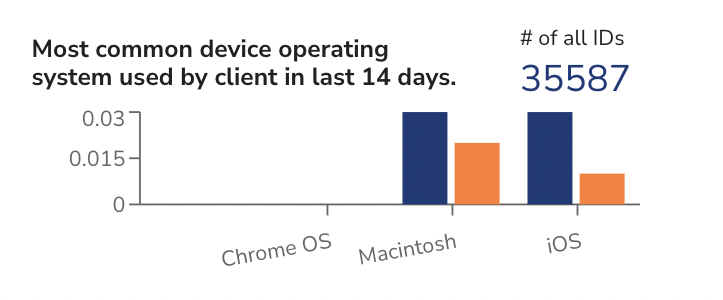
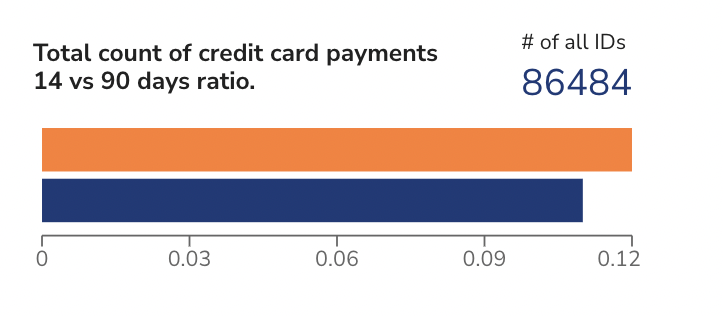
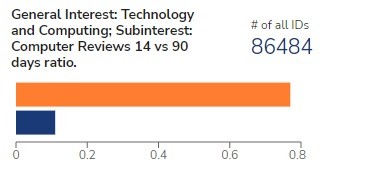
Types of attribute graphs:
Create personas
1) Look through insights and find most characteristics attributes
• It's best to select attributes that you think will create a persona together (e.g. - persona "Millenial" could consist of attributes: age 25-35, ad interest - music, etc.).
• Graphs are sometimes grouped together based on their category. To show more than 4 attributes in the category, click on "+ show more". To hide it, click " - show less".
2) Click on attributes you want to include in your persona to select them. Some attributes might need value specification (e.g. count, sum, affinity, %).
3) Move the sliders to your desired graph position and click "+ add to persona".
3) Add as many attributes as you need.
4) Name your persona before saving it.
5) Save and repeat the process if needed.
6) Personas can be revisited, just click on them when none of them are selected.
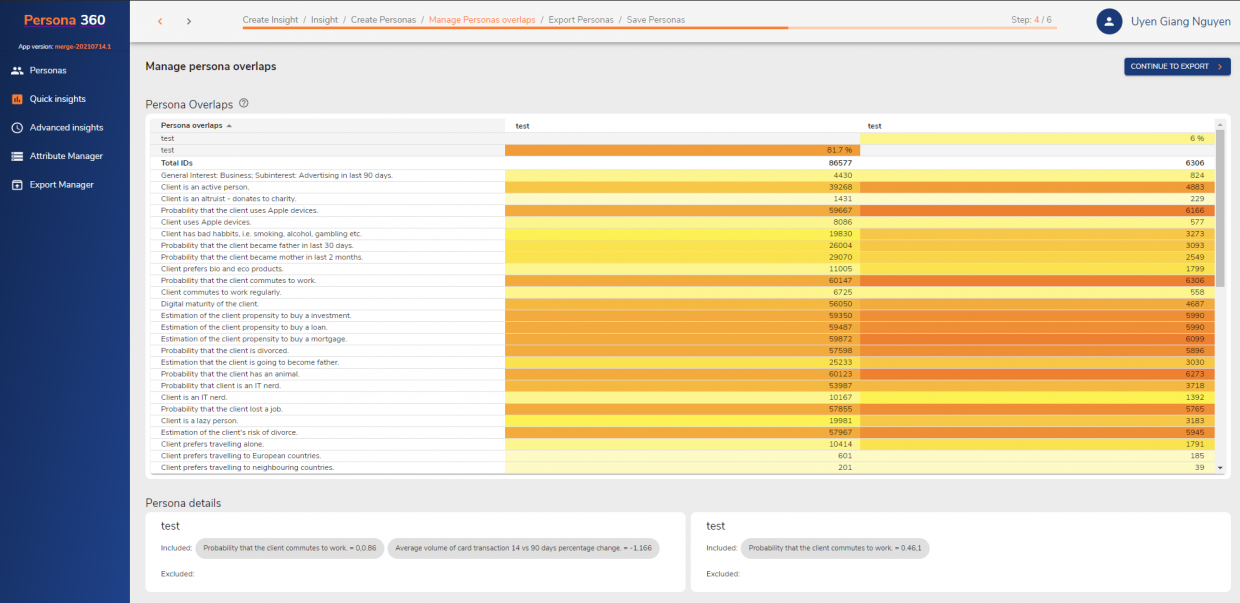
Manage persona overlaps
This screen allows you to explore overlaps of personas and browse a list of all attributes, where you can select an attribute for excluding in Persona.
Managing overlaps
1) See the % of the IDs overlapping
2) Browse the list of all attributes to see the distribution of IDs or similarities
• Colours represent the number of IDs (yellow = lowest, dark orange = highest)
3) If you want to exclude an attribute from a persona, click on a corresponding line and column
4) If you want to add more attributes, return to "*Explore key insights"*
Export Personas

Persona management
Persona status
- If you wish to use persona across your organisation or export it, select public status. If you want to keep personas visible only from your user profile, select private status.
Export status
- You can see the status of export for the given persona.
Export destination
- You can see the destinations to which the persona was exported.
New export
- Select desired export destination and fill in all the necessary information.
Create insights
- This brings you back to the first step, "Create Insight".
Create Control group from persona
- Control groups can be used to compare the performance of the selected communication channel (it will show how well is persona performing if exported to marketing tools and used further compared to the control group, that wasn't exported at all).
- You can select how many people you wish to include in the control group (we recommend 10%-20%, depending on the size of your persona).
Save Personas
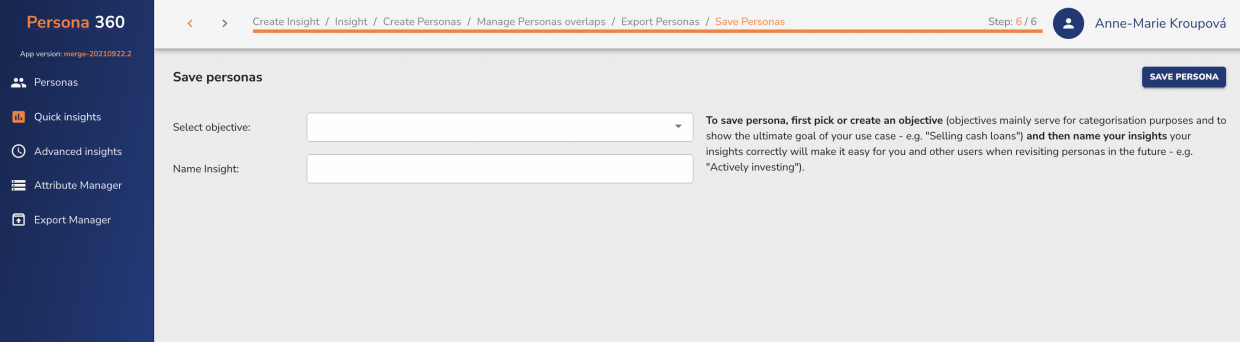
To save a persona, first, pick or create an objective (objectives mainly serve for categorisation purposes and to show the ultimate goal of your use case - e.g. “Selling cash loans” ) and then name your insights (naming your insights correctly will make it easy for you and other users when revisiting personas in the future - e.g. “Actively investing”).
Advanced insights
Advanced insights let you analyse past events by creating and running a job in Databricks, which you can then create insight from.
1. Add job name
2. Select desired events (actions) and attributes
• Choose from the action dropdown and select how long before or after the event you want to analyse
• You can also add a time span when your desired action happened (optional)
3. You can also define more filter conditions (what attributes people have)
4. Save and run Databricks job
5. Wait for your job to finish (this process could take more than an hour) and then create an insight from it to learn customer characteristics
Attribute Manager
Attribute Manager is used for the initial mapping of attributes (both digital and CRM) we want to further work with - not just in the Persona 360 app, but also in other linked external destinations. In All attributes we can then import attributes in the Persona 360 app, so we can then learn insights based on them.
All Attributes
In All attributes, we select one or multiple attributes and we can import them to the Persona 360 app so they can be used further for defining the use case, exploring insights or creating personas.
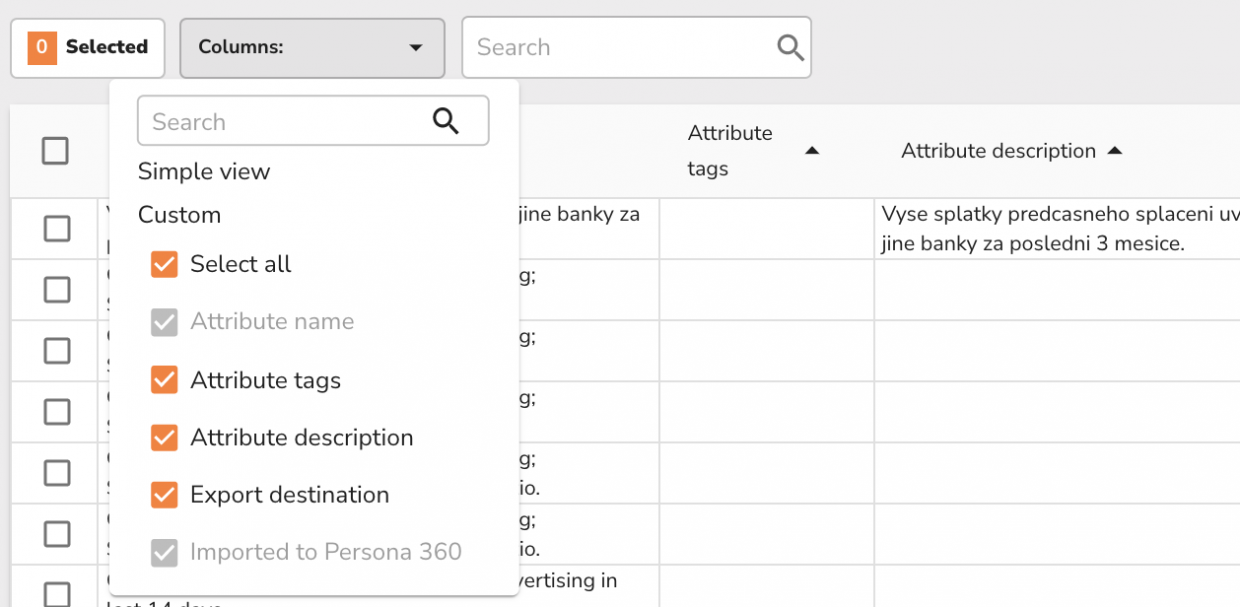
Attributes Table
View information about mapped attributes inside Persona 360 app. Information such as Name, Tags, Description Export destination, or if the attribute is imported and functional in the P360 app.

It is possible to select a custom column view. To do so, click on "Column view" dropdown and select desired information.
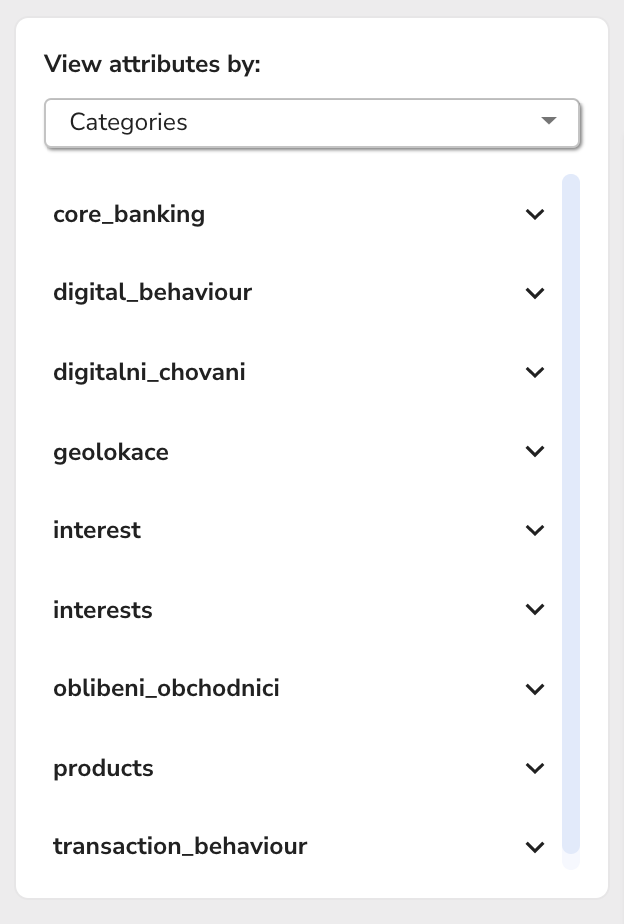
Category filter
The menu is on the left side of the "All Attributes" window. Users can filter inside "Categories" and also "Subcategories".
Import to Persona360
Import attributes selected inside the attributes table by clicking on the "Import to Persona360" button and then select the refresh frequency.
Technical information
• Categories and subcategories can be organized inside the Mapping window.
• Clicking on the Import button starts the pipeline that processes new columns into a merged data file (the process can take several minutes to complete).
Mapping
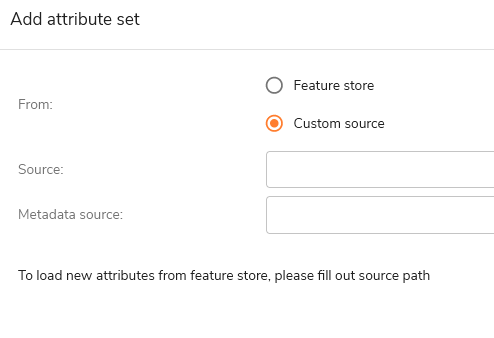
Mapping provides you with the option to view all your customers' data in one place. You can either add a new dataset or edit information about all shown attributes. You can add an attribute set either from the feature store - by selecting the feature store category, or from a custom source - by filling out the source path.
In order to use the attributes further in the Persona 360 app (for insights, or creating personas), you need to fill out certain information - attributes category, subcategory and business name. You can also add tags to your attributes or description.
Adding attributes inside FE
- Adding new features inside FE begins with clicking on "ADD ATTRIBUTE SET" button
- In the "Source" input filed, type the name of the newly saved metadata file and continue with "Load"
- After successful import, you can edit data in FE. You can edit data for all attributes, use the input fields above the table. For editing info of a particular attribute, type into the row in the table.
- When the process of editing is done, we can map the feature by clicking "ADD TO ATTRIBUTE MANAGER"
- In the final step, we can change information such as categories and subcategories of all mapped attributes.
Metadata scheme
1. Metadata file is stored in JSON format
2. Basic schema looks like this
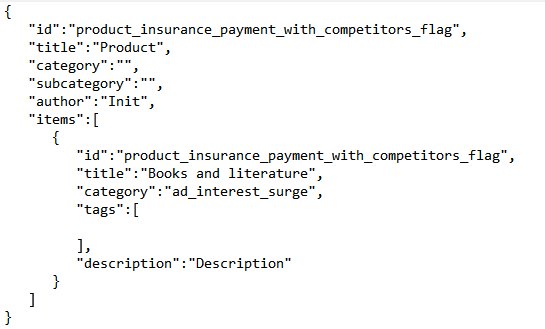
3. Only required field is, ["items"]["id"] - IDs of imported columns
Mapping new feature into dataset using feature store
- Firstly, join newly created dataset to DB named "dev_feature_store.features_client"
- Create metadata for the newly created dataset
- Metadata file should be saved as JSON, inside storage account in metadata blob
Mapping new feature into dataset using FE
1. Aquire public CSV data link, with valid IDs (IDs that are already in feature store)
2. Create metadata file(JSON), and acquire public
3. Select custom source, and type in both URLs
4. The feature will be added to feature store vie DBX job
5. Import feature, to properly use it, manual can be found in the first step
Export Manager
Export manager allows you to manage exports across the whole app and connected tools, either if it is attribute export, persona (audience) export or set up new export destination.
Attribute Export
- You can select attributes that will be exported to an external destination (like SFMC or Adform) and select the upload frequency - you want some attributes to upload more often (e.g. ad interactions, products purchased...) and some less often (e.g. name, address..)
- You can also export attributes that are not imported to the Persona 360 app (e.g. Name - which doesn't bring any value if we would use it in insights exploration)
Process of attribute export
- Search the category and subcategory menu (left side) or use the search bar to find the desired attribute. You can select multiple attributes for export and to see which attributes you have selected, click on the "selected attributes" button above the table.
- Click "export" in the right top corner. In the pop-up, you can review selected attributes and pick a destination and upload frequency (e.g. every 12 hours). If you can't see the desired destination, you need to add it in the "Destination Manager" section.
Destination Manager
Destination manager enables you to add a new destination you want to send your personas and attributes to. You can choose between a preset or custom destination.
- Preset destination will export to tools like SFMC, Adform, Facebook, etc., where you need to fill out certain information required by the tool. Each tool might have different requirements.
- Custom destination will create export with custom settings.
Process of adding new preset destination
- Select the destination from the dropdown list. If your desired destination is not on the list, continue with the custom destination
- Fill out the necessary information
- Save destination
Data Format Accepted by App
1. Boolean values - False flag, N Flag etc. —> 0; True Flag, Y Flag etc. —>1
2. Null values → if you want to include Null as 'False' flag in App → change Null (Nan values) to 0. (the app doesn't support Null/Nan values)
3. '-1', '-2' values - in case it means Null/Nan → transform to None
4. Create metadata for attributes (in JSON file) - subcategory and category for every attribute
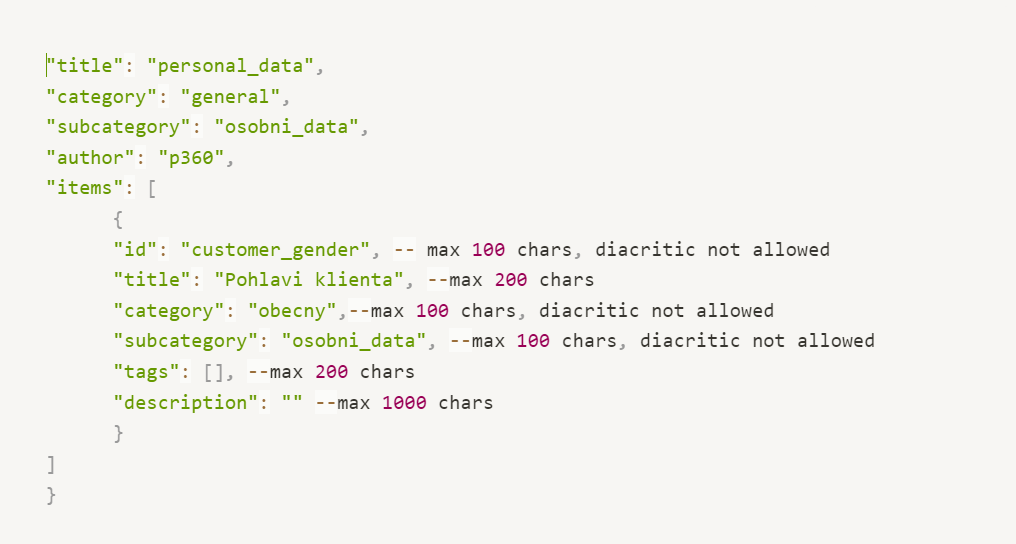
Metadata example : id = attribute name in data-set. There must be one block for every attribute (customer_gender, e.g.) and title = business name.
5. Max 15 categorial attributes.
6. There must be a column named "client_id".
client_id = GID or other client_id (from graph IDs management) - string
7. Data format type:
double → float
long → int
date → now displayed only as text
boolean → int
categorical values as "Affluent|Small Segment" won't be displayed in right way (SOLUTION IN PROGRESS)
8. Data file format: Delta or CSV with delimiter ';'